Crafting Up a New Kindle Cover
Some how my Saturday posts have all been my latest sewing projects. But I always meant for Saturdays to have posts about my latest craft projects as well. And I thought there was no better way to kick off my crafter side than by creating a new case for my Kindle.
I've had my Kindle for about 3 1/2 years now. And the case I got when I bought it wasn't exactly the highest quality to begin with
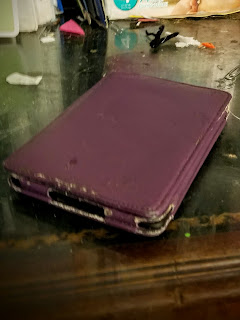
and after having to deal with first Blue and now Lion, it has definitely worse for the wear.

So I've been playing around with the perfect case to make. And after a little research and looking over projects on Pinterest, I finally settled on the perfect case for me!
instructions from Come Together Kids


I've had my Kindle for about 3 1/2 years now. And the case I got when I bought it wasn't exactly the highest quality to begin with

and after having to deal with first Blue and now Lion, it has definitely worse for the wear.

So I've been playing around with the perfect case to make. And after a little research and looking over projects on Pinterest, I finally settled on the perfect case for me!
The Project
Make A New Kindle Case
Results
The first step is also the worst step. I'm such a fan of books that its hard to think about ripping one apart. But out of the books I own, I knew I could find one that would work. And I did. I found my copy of Sweet Valley Confidential was the a good size to house my Kindle and I also knew I was never going to read it again.
I apparently picked the worst hardcover book to rip out pages (or they just make hard cover books better these days) and I had to carefully rip the pages off of the spine. And even then I got a little aggressive in some spots and ended up tearing a small hole in my spine.
After that point I went off course from the instructions. I wanted to cover the outside of my book. (I really didn't like Sweet Valley Confidential enough that I wanted to keep the title of the book out all the time). So I measured out a piece of fabric an inch bigger on all sides and used spray adhesive to attach it over my book. And then folded the excess over the sides and hot glued it down to secure down.

I had some spare minky fabric that I wanted to use on the inside, so I cut a piece the size of my book. I then cut down a cereal box so that it was about 3/4 inch smaller than all sides of my book. I then used spare adhesive to glue them together and secured the over hang on the back with some hot glue.

And since I went so far off the original instructions, I had to rethink how to make the pocket. I cut my cover fabric in a rectangle about half the length of my book and about 3/4ths the height. I folded over the top edge and used fabric glue to glue it down. I then folded the over the right edge and carefully glued down the bottom section near the spine of the book. I then wrapped the rest of the pocket around the cereal box (and made sure I left if loose so I could store things it). And then secured the fabric with hot glue.
On the other side I lined up my Kindle and marked where I wanted the elastic to come through. I then used a razor blade and cut slits to pull it through. And I found the easiest way to pull the elastic through was to loop the elastic through a paper clip and use the paper clip like a needle. I then hot glued the elastic ends to the back of the box.
Now its time for the fun part! Putting it all together!. I started with the by bending the middle of my cereal box, so that as I closed the book it would bend with it. I then hot glued the middle of my box to the spine of the book. And then I simple used spray adhesive to glue the sides together. And then because I'm a little crazy I hot glued down the edges to make sure it wouldn't come up.
And here's how my book turned out.


(You may have to put a heavy book on top of it to help keep it closed at first.)

Conclusion
I really love this cover for my Kindle. I love that it feels (and looks!) like I'm reading a real book. And I don't use the pocket to store my kindle; I instead use it to store a note pad, for any notes I want to take while reading. And I love that it easily fits in my bag.

It may not be the thinnest case, but it definitely does what its supposed to.
And now I wanted to recreate this project over and over again to fill my book case with.
Comments
Post a Comment