Posts

Showing posts from August, 2016

Monthly Project: Pack n' Play Clubhouse
Image
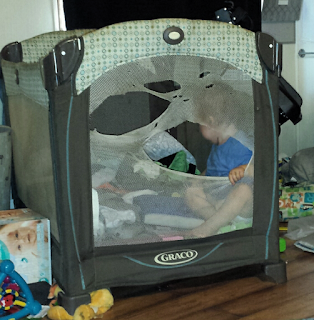
Here we are at the end of another month. And for this monthly project I have a very special upcycle project  I, like most first time parents, was so excited to buy a pack n' play while I was expecting baby Blue. I thought it would be so great. I could use it as a portable crib and play area. And I would have somewhere to put the baby. However I can only recall using it once or twice. And by the time we had baby Lion it had turned into a catch all for all the various baby toys we acquired. (I did try to find the inner piece so I could let Lion nap in there, but I only was able to find a couple of the poles.) And well as you can see below it took a lot of abuse. Somehow it even ended up with a couple of rips up the side. Which Lion loved to use to crawl into and explore the depths of toys inside. So I did a little exploring on Pinterest. and I didn't quite find the perfect upcycle idea for me. But what I did find was a couple of ideas that I thought if
Unpoppable Bubbles

Image
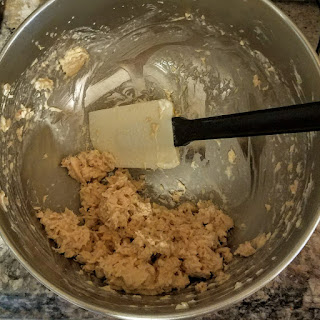
For every Try Me! Tuesday post this month I've tried out bubble recipes. And today is no different. (I figured to end summer, I would try out a bunch of summer fun ideas). And well I wanted to try out giant bubbles, but I don't have the proper wand to make that happen. (I'll save that for next summer or whenever we need some more bubble fun) Instead I was intrigued by the idea of unpoppable bubbles. Bubbles are such a flimsy thing. So i really wanted to know if I could make them slightly unpoppable.  I mean there's no way they wouldn't pop eventually, but I wanted to see if I could delay popping for a while. And I wanted to see if it was possible with common household ingredients. Project See if the following recipes will make unpoppable bubbles and which (if either) makes better and stronger bubbles Recipe #1 Recipe #2 (I couldn't find the actual website for either, but if you just search unpoppable bubbles  on Pinterest, they are both

Monday Free Write

Happy Monday! You know I do a lot of reading on the internet about parenting. (And I also skip a lot of parenting articles too). And really you can find any parenting advice or story you could ever want.  And since August is National Breastfeeding Month, right now there are a billion articles up about the importance of breastfeeding and how we need to normalize breastfeeding. (Which we really need to do. Breasts were designed by nature to feed children, not for men to sexualize. But I guess I'll talk about that later).  Somewhere in the midst of all those articles I stumbled up this articles from  Anxious Toddlers . Its a letter to all those breastfeeding fanatics that take things too far. (They bully and attack women who made a choice to bottle feed their babies. As if its any of their business how another baby gets fed) and how perhaps they need to lay off and accept that not everybody is going to breastfeed or get breast milk to feed there babies. And I sincerely love t

Salmon Salad in Avocado Boats

Image
All right here we are again with my next cooking adventure. I've been keeping it pretty easy so far. And this time is no different. (I'm sure I'll eventually work on a hard recipe, but for now I just like making simple food) So after I made the waffles, I was looking around on Pinterest for my next recipe and I stumbled upon a recipe for salmon burgers and I was so excited to try it. But the night I was going to make it, Mike (after a long day at work) just wanted pizza. So I scratched it and decided to try it another day. (and no it still hasn't happened yet). So I went back to the drawing board and discovered a different salmon recipe to try and decided to do that instead. Its a little bit easier and something I could easily handle while Lion is napping. So here we go with my next cooking experiment! The  Smoked Salmon Salad in Avocado boats full recipe from  Willow Bird Baking Results All right, all right, I didn't exactly stay true to

S is for Spider

Image
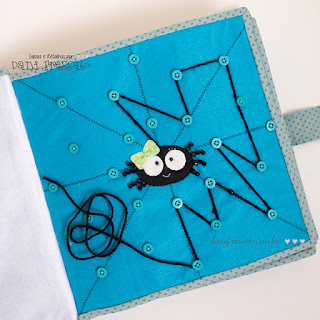
It's Friday, so you know what that means right? Its time for the next addition to the activity book! I once again tried to work out the kinks in k is for kitchen. But I still haven't figured it out. So luckily I stumbled upon this page: I was drawn to the simplicity of the design and yet it would teach kids how tie things with string. I definitely knew I needed a page like this in my activity book. So for this week I decided to go with the theme: S is for Spider Here's What You Need: Multiple colors of felt (One for your back ground, one for your spider and an optional one for a web) Assorted Buttons Sewing Machine (or needle and thread) Scissors Black Yarn Here's What You Do: Step 1: Make the Web (This is really an optional step. I just didn't look back at the inspiration page before I started and thought there was a spider web background to build over) To make your web first thing is to cut a piece of light brown (or white)

Putting Together the Lietz Family Command Center/ My Office Wall

Image
So way back in January I decided my big January project was going to be organizing my desk. And well I gave it my best shot and made some progress (not a whole lot, but some). So sometime last month while I was deciding what projects I wanted to work on, I decided maybe it was time that I finally finish up at least my office wall. For the record it used to look like this: As you can see I have it about half way to where I think it should be. And I just kind of left like that for a while. But doing this blog has inspired me to start finishing all these projects I've got in the works. And I wanted to start with my office wall/ family command center. The Project Finish Up The Command Center/ Office Wall And before I start talking about my command center I want to share a few photos of what I'm aiming to achieve with my command center. Inspiration: Overall I would like my command center to look something like this: From  One Creative Housew

Monday Free Write

Well I some how made it through two Monday Free Writes during the Olympics and somehow didn't write about them in either one. Which just seems completely odd to me. Its not like I wasn't glued to the tv watching them. (Even if I didn't like the sport being shown, it was at least a good background to work with.) So for today's free write I'm going to do a brief recap of my favorite parts of the Rio Olympics. My favorite sport in the Olympics has got to be diving. I sometimes watch it with one eye open because I'm convinced that somebody is going to hit their head on the diving board again. (I blame it all on the Mario Lopez movie about Greg Louganis hitting hit head on the diving board). So there's that and then I just really like watching the Chinese dive. The Chinese are so amazing at it (they seem to twist around better and make as little splash as possible) and really should win all the gold medals, but the never can seem to get the clean sweep. And th

Sunday Sneak Peak

Image
There haven't been a whole lot of posts this week up on the blog because I've been hard at work on many other projects Here's a sneak peak of what's to come: My wall  calendar is getting a much needed refresh I'm trying out new uses for coconut oil And I'm trying to start gardening And I've got a couple more projects that are just getting started. 

DIY Elbow Patches

Image
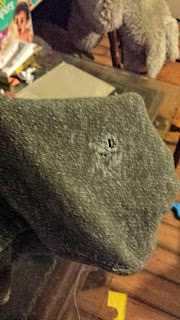
Sometimes projects find me on Pinterest and other times I have to search for them my self. (Okay most of the time projects just end up in my feed and I find them that way.) This happens to be a case where I search out a solution to my problem.  Some how (either by too much wearing or snagging it on a nail) my favorite sweater ended up with a pretty gnarly hole in the elbow.  All right as you can see above, it wasn't that bad, but I still wanted a way to fix it without a chance of another hole happening.  At first I looked up felting in the hole, but I think that only works with wool sweaters. (All right I didn't look too hard, just at the one pin I had about it and it didn't look like this was the right solution). So I began researching about elbow patches and I was pleasantly surprised to discover how easy they are to put on (and what a difference it can make to any long sleeve top) Experiment DIY Elbow Patches inspiration from Her Campus (all

A Great way to Organize Your Purse (or Diaper Bag!)

Image
The most important part of this blog is for me, is that I can use Pinterest to help get my life in order. So I thought I would start a segment for products I've discovered that have improved my life. (And I guess I should state before we begin that I'm not being paid to talk about this product. I just love it and I think you will to. The links however are associated, so if you life it please click the links to buy it!) So to kick off this new segment I want to start with a great (and cheap!) option to help organize your purse. Large Purse Organizer Insert Handbag Pouch Tidy & Neat I actually have two of these bag organizers. One that I use in my purse: I love the way it fits in my bag and I love the way I can easily store all the crap I keep in my bag.  Here's closer front view and a back view of how I organize my belongs in it. As you can see on one side I like to keep my tie for work and  spare paper to make notes and lists

Making Bubble Snakes

Image
Summer here in Florida is still kicking (despite school aged kids returning to school this week), so this week I decided to try some more bubble fun. After last Tuesdays failure at making homemade bubbles, I decided to try something a little easier (and hopefully would have more success!).  You know if you search bubble fun on Pinterest, a whole lot of ideas pop up. Starting with homemade bubbles recipes to tools to blow bubbles with to making giant bubbles. But the idea that caught my eye the most was making bubble snakes. It looks so easy to make and the amount of bubbles made would be fun for Blue and Lion to play with. I knew that this was the best project to try next! Experiment Make Bubble Snakes instructions from  She Knows Results This project is fairly simple to put everything together. The hardest part is taking off the bottom of the bottle, which is easily solved by making your first cut with a razor blade and then using scissors to cut off the rest.