July Monthly Project: Upcycle Desk Organization
Well July flew certainly flew by! So you know what the means right? Its time for my July upcycle project! For this month I thought I would share some of my favorite upcycle desk organization ideas (and upcycle some old blog posts in the process!).

I found four of my favorites, so you can spread them out over the course of the month (that comes out to about one a week) or you can easily make them all in one weekend. It truly doesn't matter because in the end you'll end up with a more organized craft area and save the world from more trash!
I found four of my favorites, so you can spread them out over the course of the month (that comes out to about one a week) or you can easily make them all in one weekend. It truly doesn't matter because in the end you'll end up with a more organized craft area and save the world from more trash!
Project 1:
Ribbon Holder
/http://assets.curbly.com/photos/0000/0006/3138/curblyribbonholder_060a1.jpg)
Project instructions found at Curbly
 .
.
I really loved this ribbon holder, but in the end it just wasn't practical for everyday use. It was hard to keep the ribbon pulled through the hole just right (it was either too little and it fell back into the container or it was too much and there was no way to wind it back in.) In the end, I ended up just using it as ribbon storage. And I just took out the ribbon spool whenever I needed.
And I was content to leave it that way until I stumbled up a better version pictured below.
Experiment #1 and Results
This was actually one of my very first projects I posted on the blog. Here's how my original ribbon holder turned out:

I really loved this ribbon holder, but in the end it just wasn't practical for everyday use. It was hard to keep the ribbon pulled through the hole just right (it was either too little and it fell back into the container or it was too much and there was no way to wind it back in.) In the end, I ended up just using it as ribbon storage. And I just took out the ribbon spool whenever I needed.
And I was content to leave it that way until I stumbled up a better version pictured below.
Experiment #2 and Results

I fell in love with this new version of the ribbon holder as soon as I saw it, but I still wasn't quite convinced to leave my old one quite yet. (I knew this one was more user friendly I just didn't want to go through all the hassle to make it). But the more I looked at, the more I knew that I had to make it.
I can't find the original post for the ribbon holder pictured above so I had to go off of what I knew from my experience from the first version. I decided to expand the width of the hole from 1 inch to about 4 inches (about a 1/3 of the circumference of the container). Other than that I followed Curbly's instructions to recreate . (I didn't notice the stand until later so I have no idea how you would even make it).
The only problem I ran into was that I cut my fabric slightly short. But I rectified that my covering it with a little ribbon (I wanted to replicate the back of women's stockings with the seam running up the back of the leg)

Conclusion:
If you are looking for easy ribbon storage that still looks stylish, this is the project for you. With the wider hole it is more user friendly and displays all your various ribbons beautifully!
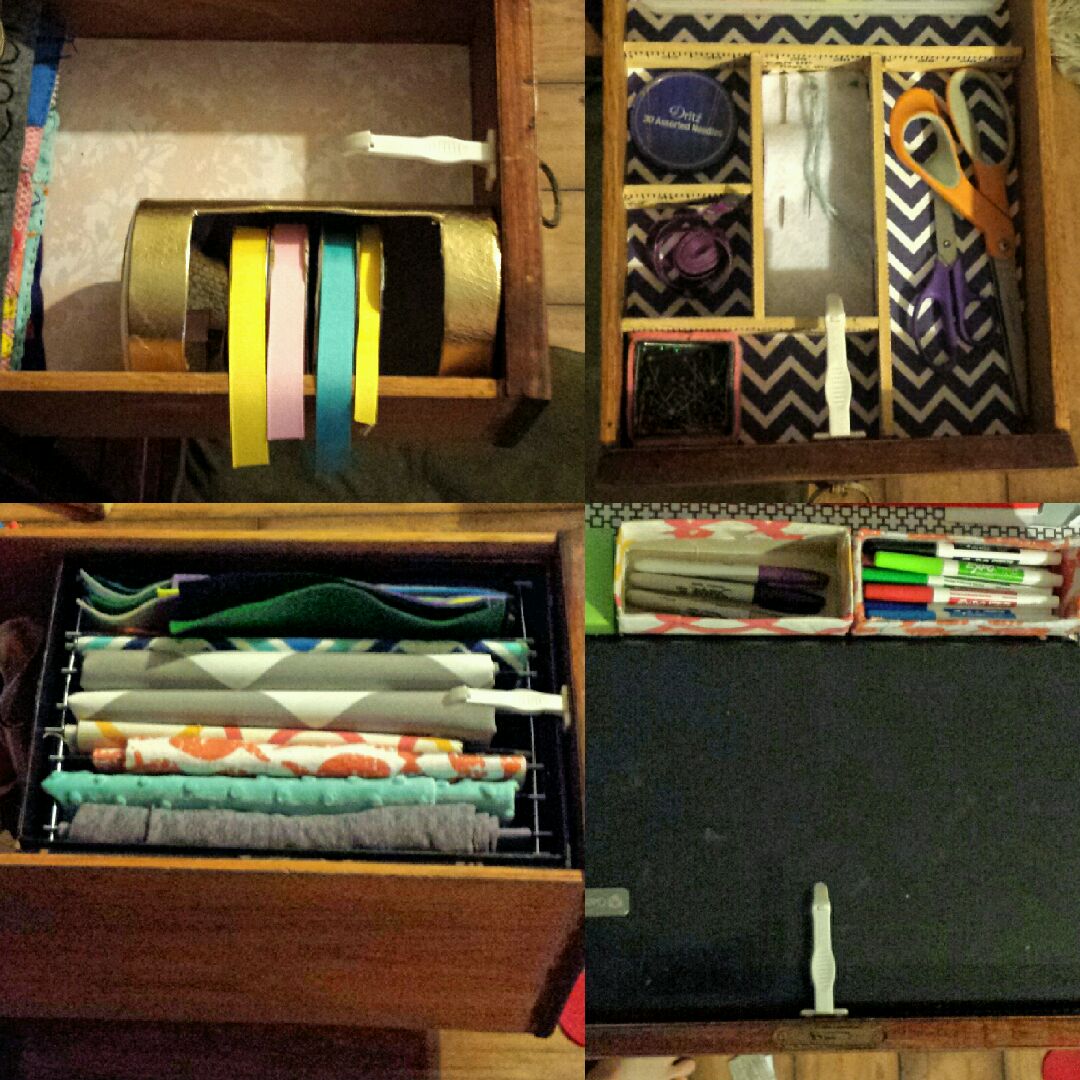
Look at how nicely mine fits in my drawer

The best part is that there is plenty of more room in the container for more ribbon and plenty of more room in my drawer for a couple more containers!
Project #2
Fabric File

Project Instructions found at The Thinking Closet

Experiment and Results
This idea is actually one of my favorites. And I really was holding out to recreate this project until I had enough fabric to fill a filing cabinet, but my fabric supply is starting to out grow my fabric basket (plus its really hard to find anything in there without digging through it all). So I decided to try my hand at it, only switching out the filing cabinet for a file box.
The instructions are quite easy to follow. You basically cut your folders in half, wrap fabric around half and then place it into the box. If you are super organized (or if you have enough fabric) you can organize it by color.
It couldn't be easier to use. My fabric is easily stored and easily found. And I even left one file together to store all my felt fabric.
Conclusion
I think having my fabric sorted into a box makes it so much easier to find exactly what I'm looking for (Or if I'm not sure I can quickly see what I have and decide which one I want to use).

As a bonus it only takes up so much room in my drawer, so I have space behind it to keep a box full of scrap fabric behind it.
Project #3
Fabric Covered Boxes

Project instructions found at I Heart Organizing
And I didn't actually follow the project instructions for this one. I just trimmed down my boxes so they measure about 2 inches tall. And then I sprayed the outside with spray adhesive and covered the boxes with fabric. And then hot glued the edges down in the inside.

Experiment and Results
For my experiment I used the bottoms of teething biscuit boxes and I just made a couple to hold my markers and expo markers that little hands seem to always find no matter where I put them on my desk.And I didn't actually follow the project instructions for this one. I just trimmed down my boxes so they measure about 2 inches tall. And then I sprayed the outside with spray adhesive and covered the boxes with fabric. And then hot glued the edges down in the inside.
I love the way that they effectively hold my pens and the way they fit into my desk drawer

and when I can finally put my pens back into my pen cup, I love that I'll be able to reuse them for other office supplies.
Conclusion
Overall, I guess I went off course from the original idea more than I thought. But the general idea is the same. So it doesn't matter how you cover them, just using the bottom of boxes is a great and easy way to organize any type of drawer you may have.
Project #4
Drawer Organizer
This inspiration for this project

Experiement and Results
I couldn't find the website that first came up with the picture above and its a great idea if you want even spaces, but for my drawer divider I did things a little different.
I had a yardstick laying around that was just about the width I wanted for the dividers (and I knew if I asked Mike nicely enough he would cut it for me). I also decided to make a blueprint for my drawer dividers to make sure I had enough space for everything I wanted to store.
Besides those quick changes I basically followed the pictures above. I used wood glue to glue my yardstick pieces together.

I left the drawer open while they dried and Lion had to come over to investigate what was happening. Once the glue dried, I reinforced the hold by gluing down both sides of the connection.
Conclusion
Since this drawer divider was being used in my sewing drawer (and I glued it with the ruler side up) having the yardstick pieces gives it a certain flare. And now I have a spare ruler whenever I need one!

To wrap up all these projects, I would like to say that I think all these projects have added a little organization to my messy desk. And I really think projects like these are upcycles we can all get behind.
Comments
Post a Comment