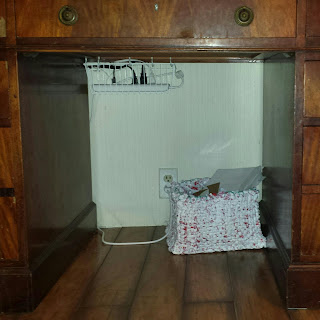
Plastic Bag Basket
April is quickly coming to an end, so that means its time for my Monthly Project! This month's project features the number one item I have in my house (and I'm sure you have quite a few of them laying around yours as well): The Plastic Bag!
You know I've been trying to do something with all my plastic bags for years now and I've just never really found anything that fit what I wanted to. So what's a girl to do? Take a little inspiration from various projects and turn it into something I knew I could create!
So without further ado here is how I turned plastic bags into a plastic bag basket (pictures will be coming soon
Here's What You Need:
- Plastic Shopping Bags (The more you have the bigger the box you can make)
- Scissors
- Heavy Duty Needle and Thread
- Clips
- Empty Cardboard Box
Here's How You Do It:
1. Braid plastic bags into a rope
First you lay your bag out flat with the sides tucked in; cut off the top and bottom
Pull out the sides; Starting with a diagonal cut, cut across your bag until you are about 2-3 inches deep and then straighten out your cut. Circle your way down the bag maintaining that 2-3 inch gap between cuts. Repeat this process 3 more times
Find the middle of your strips and hang them over any spare nail you have in the wall; Pair down your six strands to three double strands (I find it easiest to just pair the strands back together). Then braid your strands together. Knot the rope when you are done.
2. Weave Ropes Around The Box
Starting at a corner of your box clip your braids to the top of your box (if they are too long simple leave a little over hang, knot and cut and use the rest for another strip along the side).
As your placing strips around the sides of the box weave them across the bottom of your box. (I used the over under technique or the check as its really called)
One you have covered the sides and bottom, create an bottom lip for your box by taking a strip along the corner wrapping it around the strand next to it and then pulling it up. Then using the now wrapped strand repeat the process with the strand next to it. Repeat this process until you are all the way around the bottom of your box.
Once you wrapped your last strand use that last strand to start weaving your way up the side of the box.
Once you about an 2 inches from the top use the same technique as you did around the bottom along the top
3. Sew Down Loose Ends Around The Top
I wasn't quite sure the best way to tie up the lose stands around the top. So I just used some white tread and a heavy duty needle and used a blanket stitch to around the top and hold all the lose ends together .


Comments
Post a Comment