DIY Stuffed Animal Net
Growing up I always remember being able to store my stuffed animals in their own little hammock. I just loved the idea of having a place to store all of my buddies and still being able to get to them whenever I wanted. I knew that when I had kids they needed to have the same thing. And despite currently having two boys, they still have a bunch of stuffed animals, so it is completely useful to store them.
In full disclaimer it is cheaper to buy a stuffed animal hammock and hang it yourself, then making this one. But I wanted a ocean themed kids room, so this fits with the theme perfectly.
Here's What You Need:
In full disclaimer it is cheaper to buy a stuffed animal hammock and hang it yourself, then making this one. But I wanted a ocean themed kids room, so this fits with the theme perfectly.
Here's What You Need:
- Nautical Decorative Fish Net, $16.95
- 3 6" Shoreline Marine Galvanized Cleat, $3.34 each
- Braided Rope 9 Feet/Pkg-White, $6.18
- Screws and a Screwdriver
- Scissors
- Optional: South Bend Monofilament Fishing Line, $1.74
Here's How You Do It
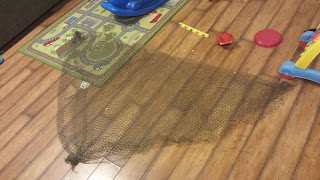
1. Lay the net out flat. Fold up one corner to create a triangle. Cut off the excess net off the triangle. Knot the corners. It should look something like this:
2. Starting in the corner between the two short sides (the right angle corner) weave the rope around the outside of the triangle.
3. Figure out which corner you want to hang the net in. Screw in a cleat just off center from that corner. Using the right angle corner tie your net to the cleat. If needed secure the knot with some fishing line.
:Here's what my finished product looks like in action:
1. Lay the net out flat. Fold up one corner to create a triangle. Cut off the excess net off the triangle. Knot the corners. It should look something like this:
2. Starting in the corner between the two short sides (the right angle corner) weave the rope around the outside of the triangle.
3. Figure out which corner you want to hang the net in. Screw in a cleat just off center from that corner. Using the right angle corner tie your net to the cleat. If needed secure the knot with some fishing line.
4. Pull out one side of the net and decide where is best to hang your next cleat. Screw in your cleat and then tie your net to the cleat (once again securing with fishing line if needed). Repeat with the other side of the net. If needed you can hang a couple of screws in the wall to hang you net on.
(I placed my cleats as far out as my net would reach and slightly below from where I put the center cleat. You can also add screws on the wall to help support your net)
:Here's what my finished product looks like in action:


Comments
Post a Comment