Posts

Showing posts with the label Activity Book

I is for Icecream

Image
For the first post of 2017, I thought I would pick it up where I left off, by sharing the next page to my activity book. I actually liked the idea of making 'I is for Ice Cream' for a while now, but I just felt like it was a too simple for the book. So I decided to search Pinterest to see what others had made. And I stumbled upon this page: Photo from All The Quiet Things It instantly assured me that an ice cream page could work in the activity book. And it also gave me an idea on how to make my own as well. Here's What You Need: Assorted Felt Fabric Glue Needle and Embroidery Thread Scissors Here's How You Do It: Step 1: Setting Up The Page I kept the set up for this page very simple. I cut out a capital letter I out of felt and sewed it on the bottom left hand corner of my page. Next I cut out a felt ice cream cone; sewed it into the middle of my page. And to complete the ice cream theme, I added an ice cream container to the right h...

Activity Book Cover

Image
Some how November came and went and in the midst of writing about pumpkins, I forgot to plan out my next activity book page. So last night, while I was trying to sleep (and feeling all right about missing one Friday in December, since there are three of them I have activity books scheduled on), it finally hit me on how to make the cover pages.  After all what is a book without a cover? The Page Front and Back Cover Pages Great Instructions from  Still Living Here's What You Need (All links are affiliated. So if you like something please buy it using the links below. I get a little kickback at no charge to you) Cardboard (or Pellon fabric if you know which one to pick) Thicker fabric (for the outside cover of your book) Thinner fabric (for the inside cover) Hot Glue Gun Spray Adhesive Here's How You Do It Step 1: Make The Cover Since my pages are about 9x9 inches, I decided to make my cover 10x10 inches. After figuring this out was to measure...

L is for Lion

Image
So after taking a little break, I found a little bit of creativity to help finish off the rest of the book. And naturally it all happened after a trip to the craft store. I went intending only to get glitter, but in the same row as the glitter there were also craft pom poms. I knew I needed white ones for a future project, but decided to pick up a multicolored package because I knew it would be perfect for the activity book. The more I looked at the package, the more I knew that they would be perfect to create a texture page. And I created a Reef page for Blue, so I knew that to be fair I needed to add a Lion page for Lion. So that's exactly what I did! The Page L is for Lion Here's What You Need: Assorted Felt Sheets Lion Pattern Craft Pom Pom Balls Needle and Embroidery Thread Scissors Stuffing (or cotton balls) Here's How You Do It: Step 1: Create and Sew Down the Lion To create my lion, I searched Lion Coloring Pages on Pinter...

Activity Book: Combining Pages

Image
So I've made it about halfway through my activity book. And I seem to have lost my drive to continue working on it. Its frustraing and I really want to continue through the other half, but I'm just at a crafter's block. (Like a writer's block only for crafters? I may have just made that up, but I assure you its different than my project add I have. I want to work on pages, I just can't seem to work out how any of them will work out, yet.) So I thought instead of forcing some half assed page in to the book this week, I would take a brief break and start putting my pages together. So here we go The Project Putting Activity Book Pages Together Here's What You Need Scissors Needle and Thread Filling Straight Pins Here's How You Do It Step 1: Prep Work For my filling, I decided to use post office boxes. (I originally wanted to use cereal boxes, but I found they were a little too flimsy and I wanted something stiffer. You could also ...

P is for Puzzle

Image
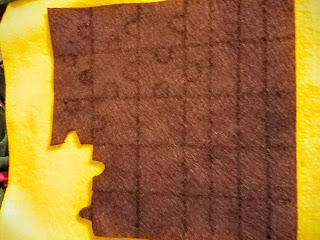
All right I know, I'm a day late (and a dollar short!), but we're still having trouble with the wifi and I attempted to write this after work last night, but I just couldn't settle in properly and come up with how to write this. So I put it off until now. Anyway I'm really proud of this page. I've been wanting to do this for a while now and I'm so excited that I finally got around to making it. So without further ado here it is The Page P is for Puzzle   Here's What You Need (All links are affiliated. So if like something please click the link to buy it and help support the blog at the same time!) Assorted Felt Sheets Needle and Thread Scissors Felt Marker Optional: Velcro or Snaps Here's How You Do It   Step 1: Setting Up The Puzzle I knew from the start that I wanted my puzzle to be two layers of felt. A neutral bottom layer and a colorful top layer. (And leave the top abstract so it wouldn't really matter if ...

E is for Elephant

Image
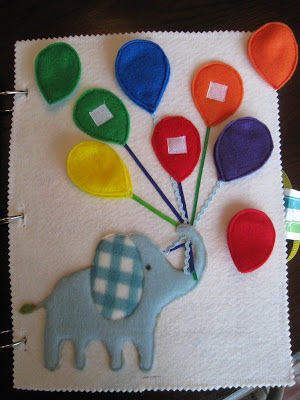
I always do such a long intro for my activity book pages, but I'm not really sure why. They all say about the same thing. Its Friday, its my new page and here's where I found my inspiration from (and why I still haven't gotten back to k is for kitchen). So for this week's page, I decided to just simplify it and just put everything listed below. The Page E is for Elephant inspiration page you can find it at  The Quiet Book Blog Here's What You Need Assorted Felt Sheets Needle and Embroidery Thread Scissors Pattern Paper (Or whatever scrap paper you have around) Here's How You Do It Step 1: Create the Elephant If you can free hand an elephant, then go ahead and draw your own for your elephant. I cannot, so I had to turn to pinteret and search for coloring page elephants for my pattern. And after sorting through a lot of the coloring pages, I settled on this one: (The website this from is currently unavailable, but here's the ...

F is for Face

Image
Happy Friday! I don't want to talk about the letter K anymore. Every week I talk about how I changed letters because I just don't know where its going. but now I kind of know what I need to do, but I just don't have time right now to focus on it.  So instead I settled for a different letter. And I drew inspiration from this page: (It was available for purchase from  PageByPage2 . I'm not sure when it will be again) I've had this idea for a while now, but for some reason I've just kept putting it off. And then I played around with how I wanted to put this all together. I thought I might sew the pieces down and have the flip different ways, to show the words of what the different body parts are.  But I thought that might be a little cluttered. (And I have enough cluttered pages in my book as it is. So in the end I decided that maybe simplicity is best and  for this week's activity book page, I decided to go with: F is for Face Her...

Actitivy Book: D is For Days

Image
All right its Friday so you know what that means, its time for the next page in the activity book. I know I keep teasing you about the kitchen page, but I keep putting it on hold because I can't quite figure out how to make it work. So instead I created a page that's been floating around my head for a little while now. I just didn't know where I wanted to put it in the book. (Or if I had the patience to make it right!). But I figured it all out and I am proud to present: D is for Days Here's What You Need Various Colors of Felt Sheets   (1 big sheet for the background and a couple of smaller sheets to create the days) Embroidery Thread and Needle Sewing Machine Scissors Velcro Strips Here's How You Make It: Step 1: Laying It Out (I know I'm queen of the blueprints for I didn't think this page called for one) The first step is to decide how big to make your day tiles. (I went with 2x3 inch rectangles that way they would ...

S is for Spider

Image
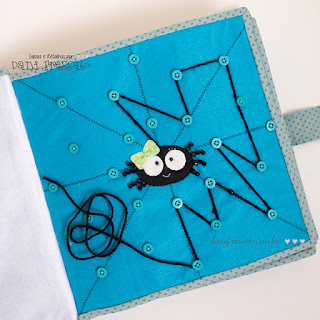
It's Friday, so you know what that means right? Its time for the next addition to the activity book! I once again tried to work out the kinks in k is for kitchen. But I still haven't figured it out. So luckily I stumbled upon this page: I was drawn to the simplicity of the design and yet it would teach kids how tie things with string. I definitely knew I needed a page like this in my activity book. So for this week I decided to go with the theme: S is for Spider Here's What You Need: Multiple colors of felt (One for your back ground, one for your spider and an optional one for a web) Assorted Buttons Sewing Machine (or needle and thread) Scissors Black Yarn Here's What You Do: Step 1: Make the Web (This is really an optional step. I just didn't look back at the inspiration page before I started and thought there was a spider web background to build over) To make your web first thing is to cut a piece of light brown (or white)...