Posts

Showing posts with the label Organization

Organizing my Finances
Image
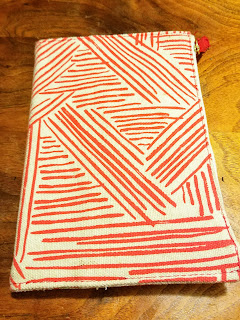
So if you recall, a couple weeks ago, I stated that my personal New Year's Resolution was to finally get my finances in order. I think I've actually made this resolution every year for the past couple years and just haven't stuck to it. But this year I'm committed and I know if I don't do this now, I'm never do this. In the past, I've tried tracking my financials on Google Slides (Google's version of excel). I found it was really easy, but it was hard to manage properly with everything being on the computer. (And having two little boys that always want to help when I'm on the computer). So for this year I decided to keep it simple and just use a journal. So to kickoff the new year, I bought myself a Mara Mi Slipcover Journal . I love that in the slip cover has a little pocket that I can store reciepts or pens or whatever else I need. And there's also zipper pocket along the side that I store bigger items in (or the little bit o...
Reorganizing My Baking/ Coffee Cabinet

Image
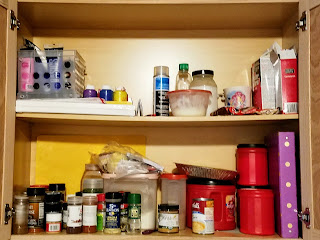
When I was looking over the November Project list, I realized that for most days of the week I have bi weekly projects and monthly projects that fall on them. But for some reason on Wednesdays I just have decorating and organizing projects. Which is fine, but I generally only make small projects to add to a room. Or just redecorate a project I've already started.  And there's nothing wrong with that. Its all stuff that helps make our house into a real home.  But part of this blog is about transforming my life. And there is no bigger part of my life that needs a change more than where and how I store my stuff around the house. That's write I'm talking all about real organization and finding the perfect place to store all this clutter we have. So to start I thought I would begin with my baking/ coffee/ crafts cabinet. Here's how it looked at the beginning of the month, As you can see everything is just kind of thrown up there without any real rhyme or reas...

A Week With My Bullet Journal

Image
I know, I know, I just wrote about my bullet journal last week, but I just love it so much that I wanted to share how it was going after I had a full week (and almost a week and half with it!). No I still haven't added washi tape to the seams (even though I probably should). I discovered over the course of the week  how to better organize my thoughts so the bullet journal works better for me. And I thought I would share so maybe it will help you out as well! The first thing I realized is that having a daily to do list is nice, but I like to over schedule myself (or I just work on what I want and don't care about what's on my to do list) and was constantly putting down the same item on my to do list for multiple days. So I decided to make one big weekly to do list. And since I had one big to do list, I no longer needed to take a full page for everyday of the week (plus it was taking up a lot of space in my journal!). So I had to adjust my journal and ...

Plastic Bag Basket

Image
April is quickly coming to an end, so that means its time for my Monthly Project! This month's project features the number one item I have in my house (and I'm sure you have quite a few of them laying around yours as well): The Plastic Bag!  You know I've been trying to do something with all my plastic bags for years now and I've just never really found anything that fit what I wanted to. So what's a girl to do? Take a little inspiration from various projects and turn it into something I knew I could create! So without further ado here is how I turned plastic bags into a plastic bag basket (pictures will be coming soon Here's What You Need: Plastic Shopping Bags (The more you have the bigger the box you can make) Scissors Heavy Duty Needle and Thread Clips Empty Cardboard Box  Here's How You Do It: 1. Braid plastic bags into a rope First you lay your bag out flat with the sides tucked in; cut off the top and bottom Pull out the sides; St...

DIY Pin Cushion

Image
The top right drawer of my desk is slowly being transformed into my sewing supply drawer. My first step in to completing this project is finally creating my own pin holder. I've been playing around with making a pin cushion for a while now, but my sewing skills aren't that great yet. And well I was never quite sure where to start. Then I stumbled a blog post talking about using a magnetic pin bowl instead of the standard pin cushion. And I knew that was what I wanted to make. Here's What You Need: Square Magnets , $5.18 Felt Duct Tape Needle and Thread Scissors Here's How You Do It: Create a Felt Box:  Cut out a 5x5 inch square out of your felt. Cut out triangles out of the corners of your square. (Like so): Next pin together the sides. Stitch the sides together.  Repeat the steps using a 4x4 inch felt square to create a lid. Create a Magnet Box Arrange your magnets into the following panels: 1- 2x2 Square 4- 2x1 Rectangles Usin...

DIY Stuffed Animal Net

Image
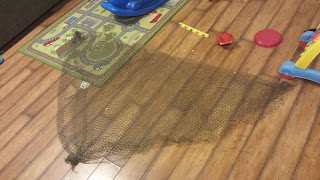
Growing up I always remember being able to store my stuffed animals in their own little hammock. I just loved the idea of having a place to store all of my buddies and still being able to get to them whenever I wanted. I knew that when I had kids they needed to have the same thing. And despite currently having two boys, they still have a bunch of stuffed animals, so it is completely useful to store them. In full disclaimer it is cheaper to buy a stuffed animal hammock and hang it yourself, then making this one. But I wanted a ocean themed kids room, so this fits with the theme perfectly. Here's What You Need: Nautical Decorative Fish Net , $16.95 3 6"  Shoreline Marine Galvanized Cleat , $3.34 each Braided Rope 9 Feet/Pkg-White , $6.18 Screws and a Screwdriver Scissors Optional:  South Bend Monofilament Fishing Line , $1.74 Here's How You Do It 1. Lay the net out flat. Fold up one corner to create a triangle. Cut off the excess net off the triangle. Knot th...

Desk Organization Part 1: Taming the Wires

Image
Do not be alarmed at the following picture. This is unfortunately how unorganized my desk looked at the beginning of the year. It's terrible... I know. But this is exactly why my yearly goal is to get our house organized. So over the past week I have done nothing more than search for Craft Room organization ideas on Pinterest. And the only thing I really learned is that people have really elaborate craft rooms with really immaculate organization schemes. Unfortunately my craft area is just my (very messy) desk for now. And even that area I need to serve three different functions. It needs to work as my family command center, my craft storage area and eventually as a work area. So while I'm still on the hunt for creative storage solutions for my desk, I did find a life hack to improve the wires hanging behind my desk (and, as you can see below, to keep them some what out of Blu's reach). Here's everything you'll need to get this project done (Blu...

Organization Begins with a Plan(ner)

Image
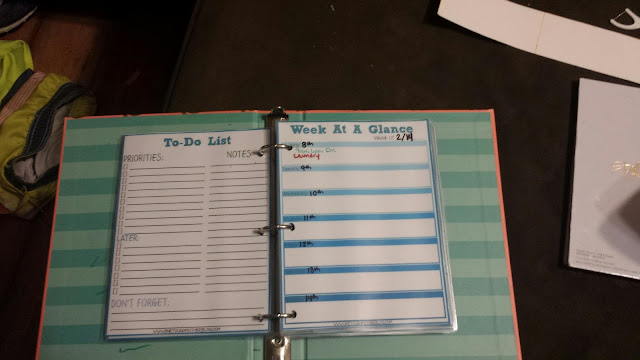
It seems like every year I make the same old resolution: to get my life organized. And you know what, this year I really have no excuse not to do it. I've got two children, a busy work schedule, bills that need to be paid, a blog that I'd like to start blossoming and well quite frankly I'll be turning 29. There is no better time to do it and really if I don't get around to it this year, I'm afraid I'll never get around to it. So to make this year different I've decided that instead of tackling the entire house as a whole it would be wiser to tackle the house room by room (or space by space).  Naturally my first space to tackle is my planner. In year's past I've just bought one in the store (and really there is nothing wrong with them), but this year I decided to put one together myself.  There are several different planner systems if you search on Pinterest, but I prefer the planning system from  Sweet Tea & Saving Grace  (nee One Tough Mothe...