Children's Play Christmas Tree
Okay so here we go the long promised write up for my Children's play Chritsmas tree (that I finished too late for a Christmas post, so I held it for a year!).
For the past couple of years (much to the humor of my father-in-law) I didn't decorate our Christmas tree. Since both of the boys are little and well, I didn't trust them not to have to play (and break) all of my ornaments. (And yes I'm trying out shatterproof ornaments this year. So far the balls are intact, but the tops are being ripped off.)
So this year I was wasting time at work on Facebook, when I stumbled upon a play tree project from Jo-Ann Fabrics. I couldn't believe my luck and knew I had to make it for my boys.
The Project
Create a Christmas Tree for the Boys
Instructions from Joann Fabrics Makers Guide
(all product links are affliated. So if you like it or need it please use the links and the blog with get a kickback at no expense to you!)
Results
The project instructions are for a 2 feet tree, but I was worried that it would be too small for Blue. So I adjusted all the measurements and made it into a 3 feet tree instead.
Making the tree isn't hard. (The worst part was getting the green felt cut and having to explain that all that felt is going into one big cone tree. and not a bunch of little ones) After that all you need to do is use chalk and string to measure out a couple of circles: 1 big one to give your tree height and a smaller one for the base. (The stiffer your string the easier the circles are to draw). Cut those out.
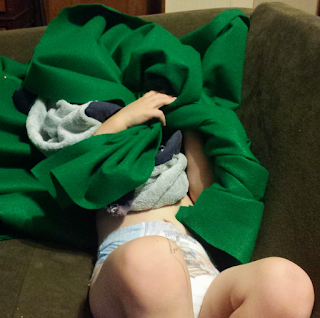
And since the directions weren't that clear on what angle to cut the big circle at, I asked my mom. And she advised to sew the big circle onto the base and then cut once I reached the other side. At this point Blue stole the felt and decided to turn it into a blanket.
Yes he's really sleeping under there! So I swiftly removed the felt from his grasp and put him into bed. Who say's parents don't have super powers?
Which worked (and it ended up being a little bigger than half the circle getting sewn down.) And then stuff the tree. I ended up needing about 9 pounds of poly-fil stuffing.
Next is the fun task of cutting out all the the leaves and then gluing them onto the tree. And since I always think I know what I'm doing I ended up gluing mine on upside down.
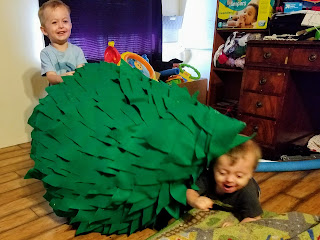
So here is how my tree turned out:
It looks like a giant green leafy Hershey's kiss
I eventually made a star for the tree
I just used this star coloring page for the pattern and then made a small yellow cone for a base. (and I also made some ornaments using various coloring pages found on Pinterest, but Blue wouldn't let any of them actually stay on the tree for long. So they all got misplaced!)
And the best part is now the boys just want to play with it instead of the real tree!


Comments
Post a Comment